
Share This Post:
Connecting the Agent Dashboard to the Voicent App
When setting up your agents in a call center, you have to connect their Agent Dashboards to the Voicent App. This lets them receive calls from Predictive Dialing campaigns or pull data from the CRM. There are generally three different cases when connecting an Agent Dashboard to the Voicent App, and they rely on the location of the Voicent App versus the Agent Dashboard.
- Voicent App is on the same computer as the Agent Dashboard
- Voicent App is on a locally networked computer (same office)
- Voicent App is on a remote computer
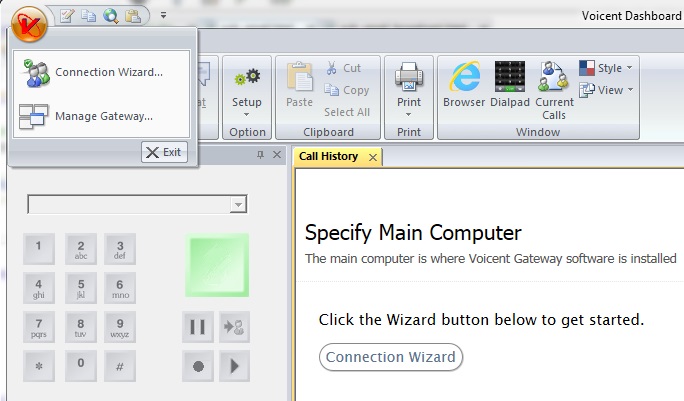
No matter where the Voicent App is, you’ll go to the same place to configure these settings. Inside the Agent Dashboard, click on the “V” logo in the top left corner. This will open up a menu with two options: Connection Wizard, and Manage Gateway. Click on Connection Wizard, and then go the instructions below that match the location of the Voicent App you are trying to connect to.
Connecting to Voicent App on the Same Computer
Once you’re inside the Connection Wizard, click on “Voicent’s on-premise software.” Now select the option “This computer.” Hit “Finish” and your Agent Dashboard will be ready for you to log into. (How to Create An Agent Login)
Connecting to Voicent App on a locally networked Computer
Once you’re inside the Connection Wizard, click on “Voicent’s on-premise software.” Now select the option “Connect to a computer that is networked locally.” Here you will need to enter information regarding the computer with the Voicent App installed on it. You will need the IP address (or name if available).
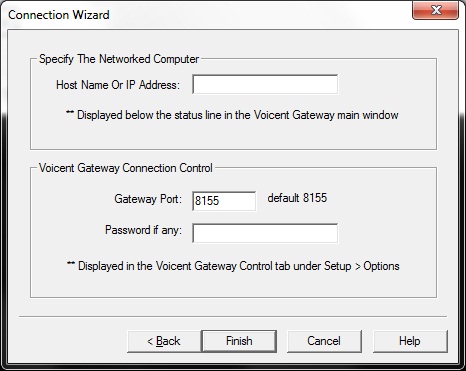
Optionally, if you have designated specific port and password settings on the Voicent App, you will need to enter those in the Voicent Gateway Connection Control area of the menu. Once you’ve entered the information, click “Finish” and you are ready to log the agent in.
Connecting to Voicent App on a Remote Computer
Once you’re inside the Connection Wizard, click on “Voicent’s on-premise software.” Now select the option “Connect to a computer on the Internet.” This will bring you to the following screen where you can select either “The server is behind a router” or “the sever can be accessed directly from the Internet.” Each option will bring you to the same screen as the one pictured above for local area networks. The difference is that you must provide different IP addresses for computers that are behind firewalls versus ones that can be accessed directly from the internet. For more information, learn about the difference between external and internal IP addresses.
Share This Post: