Share This Post:
Workflow Progress
Tracking your leads through the sales pipeline, from milestone to milestone, is a fundamental part of making a sale. We refer to this progression from milestone to milestone as the Lead Journey within Voicent software. This idea mirrors the sales pipeline within your organization. Related to each milestone are the series of tasks needed to get from one milestone to the next. This series of tasks is what Workflow Progress executes.
Milestones
In order to create a Workflow Progress, you first have to define a few milestones. We recommend creating enough milestones so that you can represent each step within your standard sales pipeline. Milestones are created by going to Setup > Contact > Milestone.
These milestones are used to inform anyone looking at the CRM record that the lead has progressed to a certain point, either by expressing intent to purchase a product or service, or maybe just filling out a Subscription form on your site blog. Regardless, they need to be distinguished between those who have already been qualified, and those who are already customers. Milestones are your way of doing that.
Creating a Workflow Progress
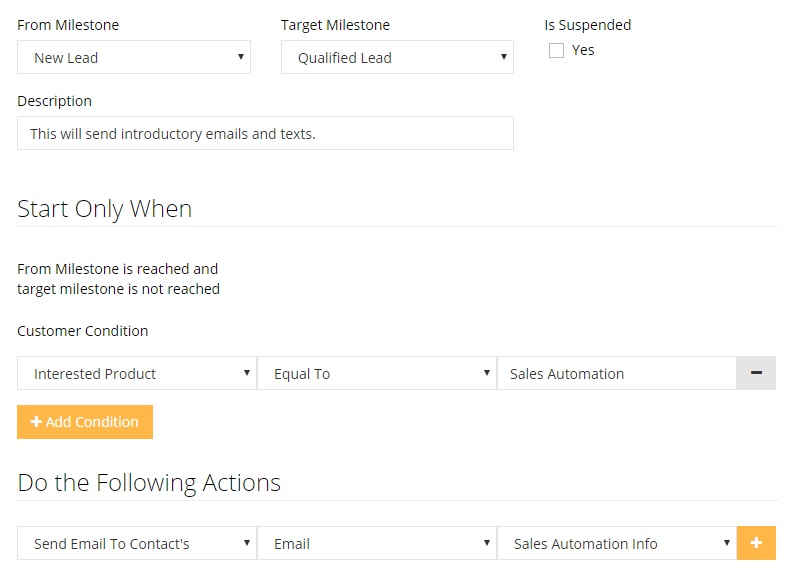
Now that you have some milestones, you can begin to structure your Workflow Progress. Each Workflow Progress consists of a starting and stopping condition, which are both a milestone. This means the Workflow Progress will start executing when the start milestone has been reached, and will stop when the end milestone has been reached.
In between the start and stop milestone, the user-defined actions will be executed. In the example below, the Workflow Progress will send out an email to any CRM records with the interested product field set to “Sales Automation” that are in the New Lead milestone. To create a Workflow Progress like the one below, go to Setup > Workflow > Progress.

Share This Post:
